
Create your own creepy Halloween graveyard using styrofoam tombstones, artificial autumn leaves, and a few inexpensive decorations.
This DIY project features four weathered tombstones with spooky names, cracked surfaces, and twisted branches for an abandoned cemetery look.
It’s a budget-friendly Halloween decoration you can display on your front porch, covered patio, balcony, or even indoors. Best of all, you don’t need advanced crafting skills to make it!
Materials You’ll Need
- 1–2-inch-thick styrofoam or rigid XPS foam board
- Marker or pencil
- Utility knife or foam cutter
- Medium-grit sandpaper
- Gray, black, and white acrylic paint
- Paintbrushes and sponge
- Black acrylic paint pen or letter stencils
- Foam-safe craft glue or construction adhesive
- Scrap foam for tombstone supports
- Artificial orange and red autumn leaves
- Thin, dry branches or twigs
- Small container and stones to hold the branches
- Plastic rats, spiders, or other creepy decorations
- Battery-operated LED tea lights (optional)
- Wooden stakes for outdoor lawn displays (optional)
Step 1: Draw Your Tombstone Shapes
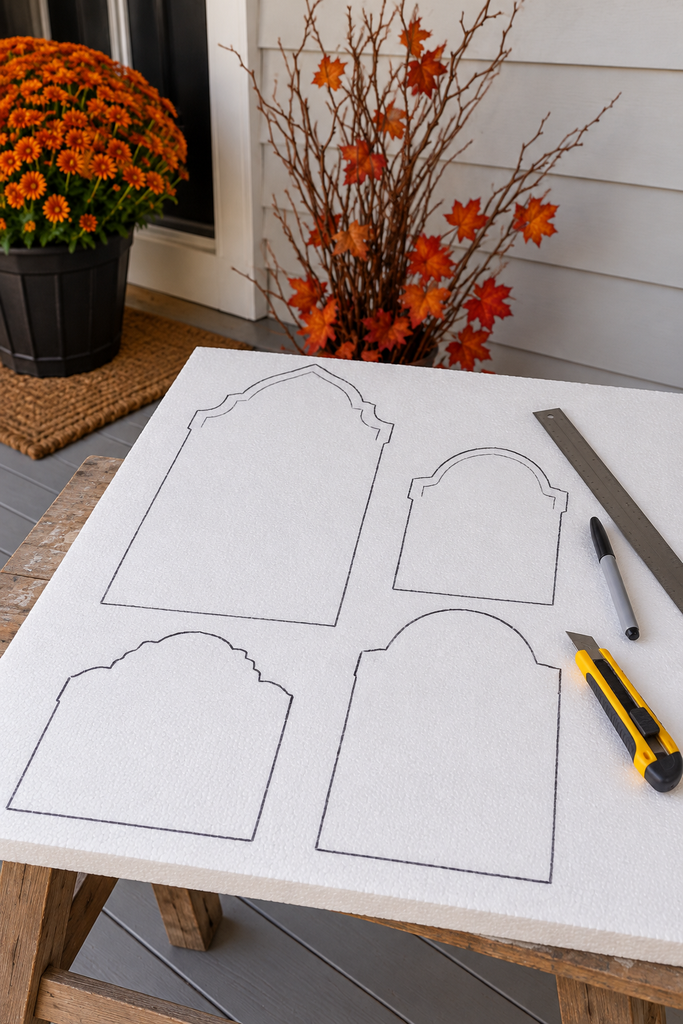
Start by drawing four tombstone outlines on your styrofoam board.
Make them different heights, approximately 12 to 28 inches tall, to create a more natural-looking graveyard.

Use a mixture of rounded tops, slightly pointed arches, and uneven edges so each tombstone has its own appearance.
Leave enough space between the outlines for cutting.
Step 2: Cut and Add Cracked Stone Details
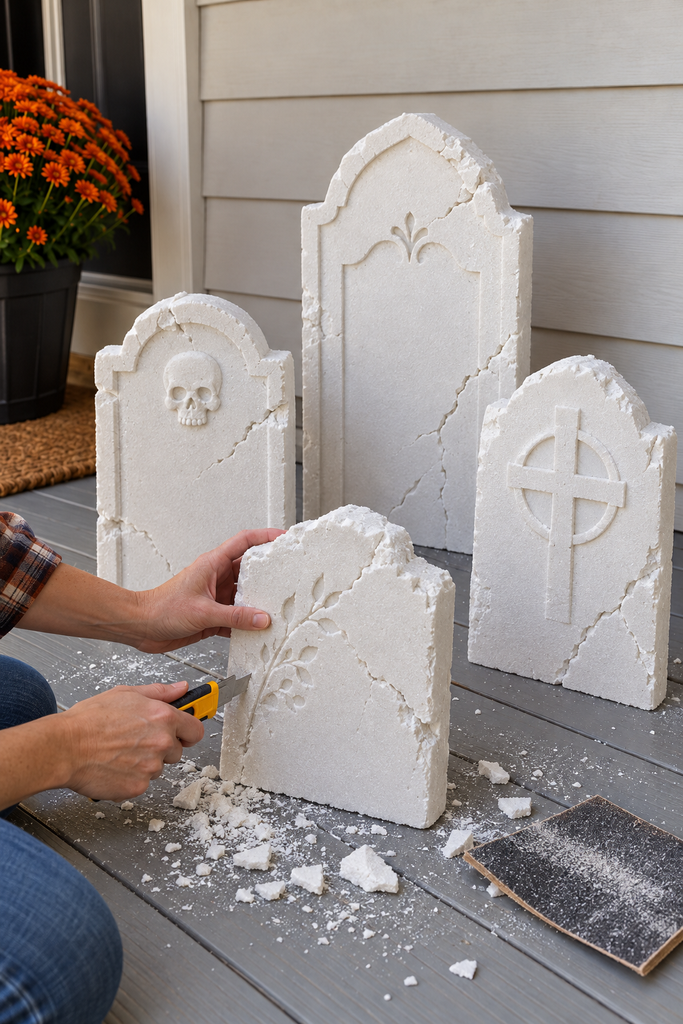
Carefully cut along your outlines using a utility knife or foam cutter. Make several shallow passes rather than trying to cut through thick foam at once.
Lightly sand the edges to remove rough pieces.
Use a pencil or the tip of your utility knife to create shallow cracks, chipped corners, and uneven stone details.
These small imperfections will help the tombstones look old and weathered.
Step 3: Paint the Tombstones Gray
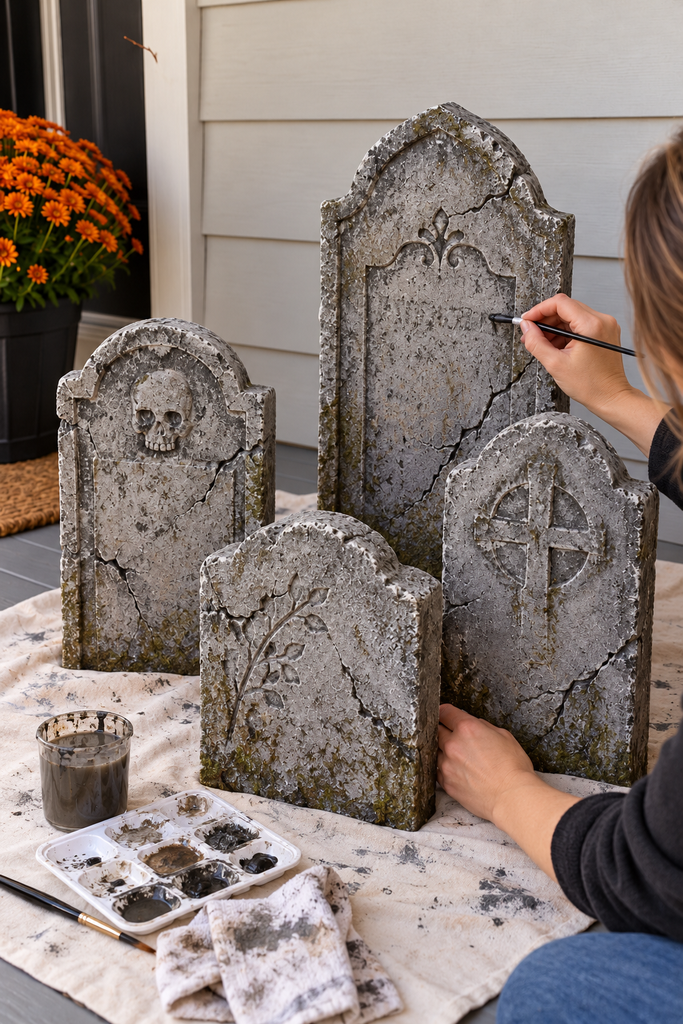
Paint each tombstone with gray acrylic paint and allow it to dry.
Use a sponge to dab darker gray and black paint around the edges, cracks, and corners.

Next, lightly dry-brush white or light gray paint over the raised areas to create a worn stone texture.
Keep the shading uneven so the tombstones look naturally aged.
Tip: Avoid regular spray paint directly on styrofoam or XPS foam because some solvents can melt it.
Step 4: Make the Tombstones Stand Upright
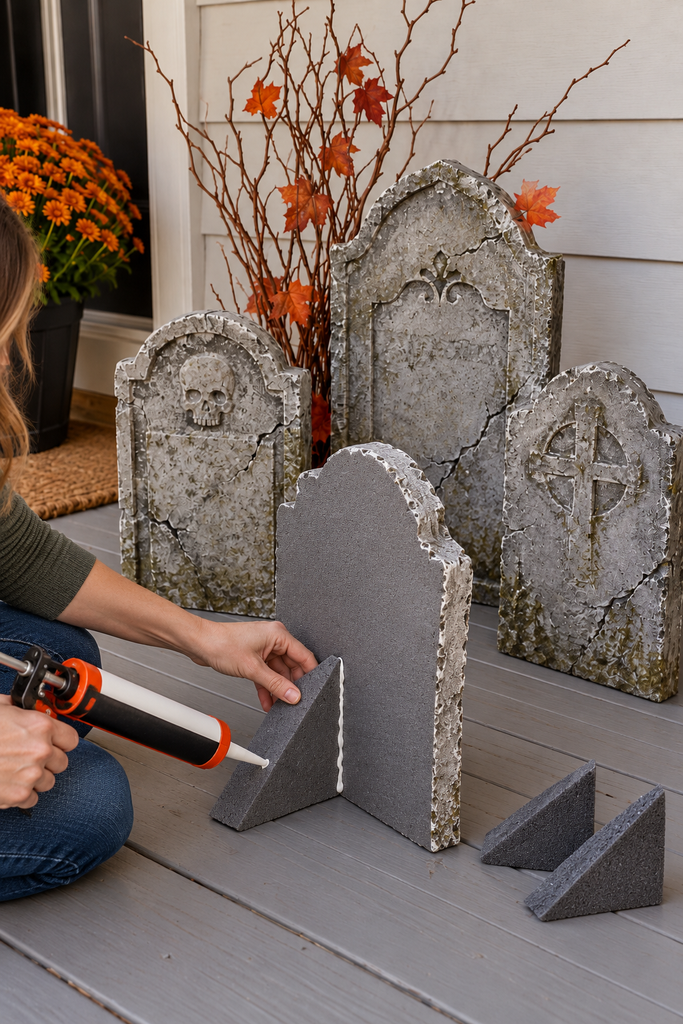
For indoor displays or covered balconies, cut two triangular foam supports for the back of each tombstone.
Make the supports approximately 6–8 inches deep and attach them perpendicular to the tombstones using foam-safe adhesive. Allow the glue to cure completely.
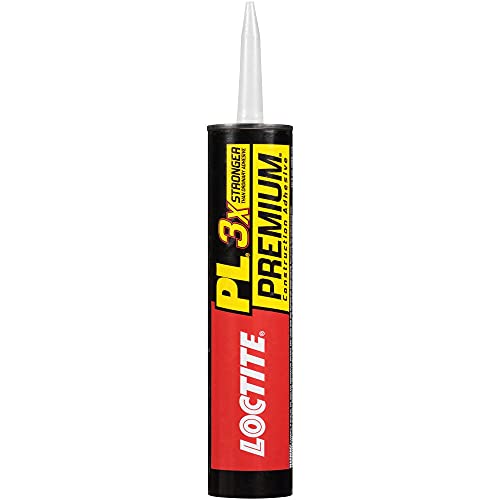
These hidden braces help the tombstones stand upright on a flat surface.
For lawn displays, attach wooden stakes securely to the backs and push them into the ground.
Make sure each tombstone is stable before adding decorations.
Step 5: Arrange Your Halloween Graveyard
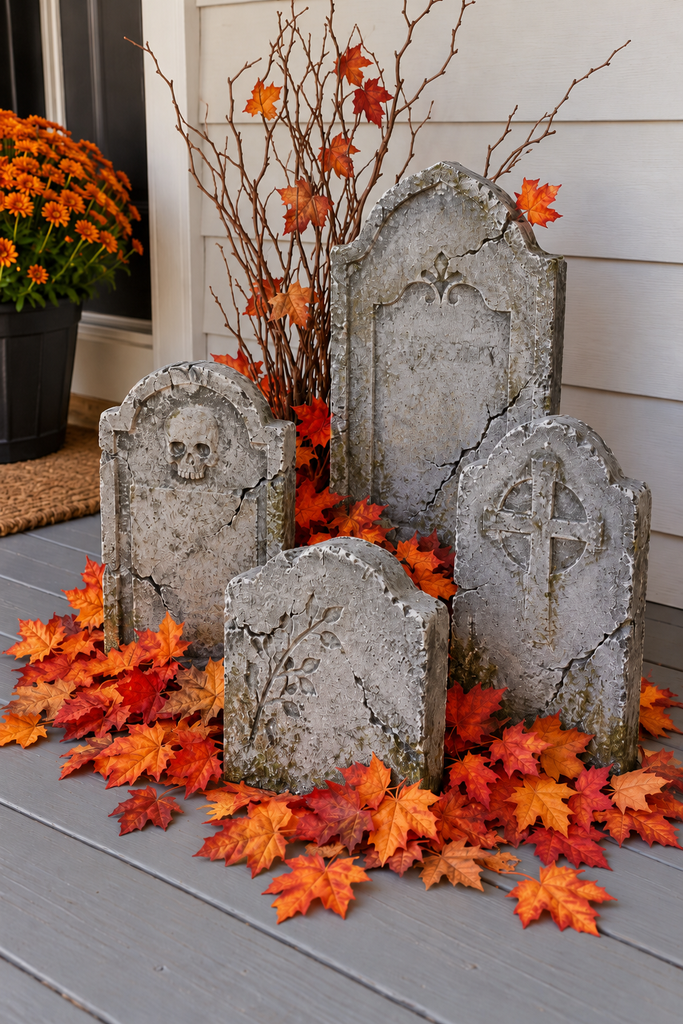
Place your four tombstones together, with the tallest toward the back and the shorter ones in front.
Stagger their positions slightly instead of arranging them in a perfectly straight row.
Place a few thin, twisted branches behind the tombstones to create a creepy, abandoned cemetery effect. Secure the branches in a small container weighted with stones and hide it behind the display.

Scatter artificial orange and red autumn leaves around the bases of the tombstones.
Tuck a few leaves between the stones and around the branches to make the arrangement look naturally overgrown.
Step 6: Add the Creepy Finishing Touches
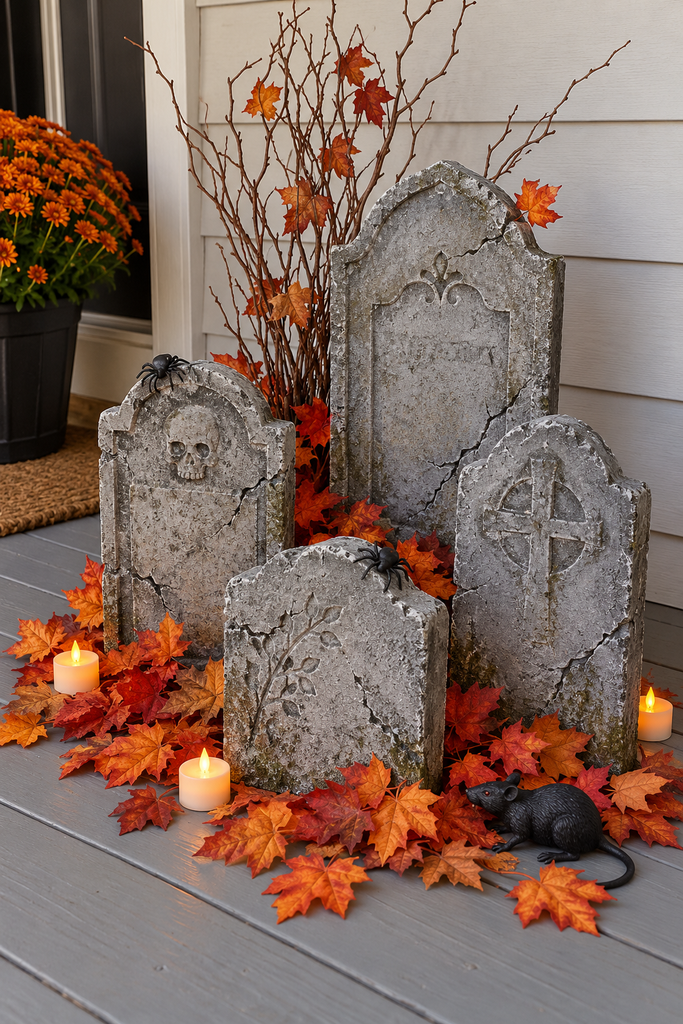
Place a small plastic rat or a few spiders near the tombstones for an extra spooky detail.
For nighttime displays, position battery-operated LED tea lights behind or beside the gravestones to create soft, eerie shadows.

Adjust the branches and leaves until the graveyard looks full without hiding the inscriptions.
Your DIY Halloween tombstone graveyard is ready to display!
Make Your Mini Graveyard Look More Realistic
For a convincing cemetery effect, avoid making every tombstone the same shade of gray. Give one darker edges, another deeper cracks, and another faded lettering.
If you’re displaying your graveyard outdoors, keep it in a sheltered area and secure the lightweight pieces against wind. Apply a foam-compatible exterior sealant if needed, following the product instructions.
The slight differences between the tombstones will make your homemade graveyard feel older, creepier, and more authentic.